Author: Colin Northway

  • Mixed Reality With Quartered Screens

    There are a couple of reasons you might not want to use the in-game webcam system (which is easier to set up). For technical reasons the in-game system only supports webcams so if you are using a camera with a capture card you can’t use it. This is unfortunate because webcams look terrible when the subject is more than a meter or two away from the camera. You might also be compositing the layers together after-the-fact in which case you will need to use this method to get the foreground/background split into two.

    1. Game Setup

    Game setup is pretty easy:

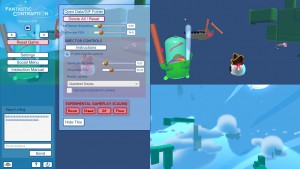
    • Start the game holding shift while opening the game in steam. This will open the resolution options. Set the game to open full screen at the resolution of your  monitor.
    • Open the “Settings” menu (you might have to hit the eye button to open the left-menu if it’s closed
    • Turn on “Enable director controlls”
    • Pick “Quatered Views” in the Camera dropdown
    • Close the settings menu

    2. OBS setup

    OBS (Open Broadcasting Software) is popular streaming software and is pleasently flexible. Weirdly OBS makes it kind of hard to export settings files so I’m going to walk you through setting it up for Fantastic Contraption. It’s good to know how this works anyway so you can make any changes you might decide you want to make. First download OBS if you don’t have it already (download the Studio version). Then open OBS.

    Note that since the game is broken into four quadrants your output resolution will be half of whatever your screen resolution is. I’m going to do this totorial with a 4k monitor which will let me stream at 1080 but you don’t need a 4k screen to stream the game. Just adjust the numbers to whatever resolution your monitor runs at.

    First let’s add the game background:

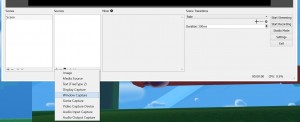
    • Hit the “+” under “Sources” and select “Window Capture”. Name the layer “Background”selectWindowCapture
    • Select “Fantastic Contraption” in the “Window” dropdown
    • Flip off “Capture Cursor”
    • Hit “ok”
    • Right click on “Background” and select “Filters”
    • Hit the “+” on the Filters window and select “Crop”
    • Set the “Right” to “1920” (or half of whatever your monitor width is)
    • Set the “Bottom” to “1080” (or half of whatever your monitor height is)cropValues
    • Hit close
    • Grab the little red circle at the bottom right and resize the layer to fill the whole canvas area

    Now let’s add the webcam

    • Hit the little “+” under “Sources” again and select “Video Capture Device”. Name the layer “RL Camera”
    • Under “Device” select your camera
    • Hit “ok”
    • Resize the camera layer to fill the whole canvas area
    • Right click on “RL Camera” and select “Filters”
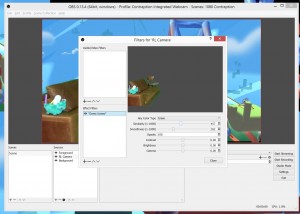
    • Hit the “+” under “Effect Filters” and select “Color Key”. Name it “Green Screen”
    • Fiddle with “Similarity” and “Smoothness” until you get the desired effectcolourKey
    • Hit close

    Lastly, let’s add the game foreground:

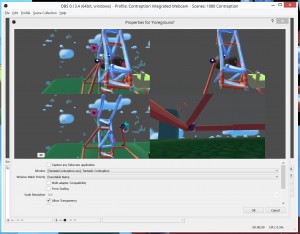
    • Hit the “+” under “Sources” and select “Game Capture” name the layer “Foreground”
    • Unslect “Capture Any Foreground Application”
    • Select “Fantastic Contraption” in the “Window” dropdown.
    • Check “Allow Transparency”
    • Flip off “Capture Cursor”foregroundOptions
    • Hit “ok”
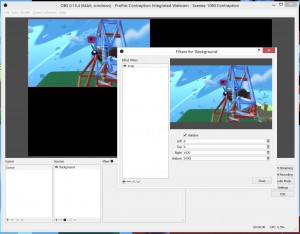
    • Right click on “Foreground” and select “Filters”
    • Hit the “+” on the Filters window and select “Crop”
    • Set the “Left” to “1920” (or half of whatever your monitor width is)
    • Set the “Bottom” to “1080” (or half of whatever your monitor height is)
    • Hit close
    • Grab the little red circle at the bottom right and resize the layer to fill the whole canvas area

    OBS setup Done!

    3. Camera Sync

    • The last thing you have to do is sync the in-game camera with the real world camera. This means moving the in-game camera to where the real-world camera is and setting the in-game camera Field of View to match the real-world camera. This is all done very manually.
    • Make sure the game and OBS are both open and the game has the Depth Cameras turned on
    • Now open the OBS file menu and select “Always On Top”
    • Give the game focus and use the wasd keys (as well as q & e for up & down) to fly the camera around. Use the arrow keys to change the angle the camera looks.
    • This will be much easier with another person to help you. To get a rough idea of where the camera should be have the other person go into VR. They will see an insect with a big eye and wings, that’s your camera. Have them direct you, move the in-game camera to where the real-world camera is.

      Using hand controller positions to align the cameras
      Using hand controller positions to align the cameras
    • Then have them pick up the two controllers and walk to the back of the play area. Get them to hold out their arms in a T-pose and then not move. Using the arrow keys change the angle of the camera until the controllers are as close to matching the real-world controllers as possible.  Note that the FOV is still off so you won’t get a good match.
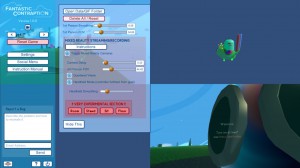
    • To match the FOV make the OBS window small enough that you can use the game’s settings menu again. Open the settings menu
    • Drag the “3rd person FOV” slider until the in-game controllers are the same distance apart as your friends (very tired) arms.
    • After setting the position and FOV set the “Camera Delay” slider. You will notice the camera lags behind the game as the player moves around. This slider will delay the game so it can match the delay of the camera. Drag this slider until the game and the player are in sync.
    • You are done setup! Because of lighthouse drift and camera jostling you will probably have to re-tune this every time you stream.


    Now go back to the previous instructions to learn the Director Controls.


  • Streaming and Recording Mixed Reality

    Welcome! We’ve spent a lot of time on the streaming tools for Fantastic Contraption. We were the first people to use these Mixed Reality techniques to show VR and we’d love for you to come join us in the game.

    maxresdefault (1)

    The instructions are broken up into three sections. Start with our first Mixed Reality Streaming How To. If you’re using a webcam then that’s all you need to know. If you’re using a fancier camera or want to do your compositing in post check out our Mixed Reality with Quartered Screens post and if you want to go full-badass and stream with a handheld camera we have Hand Held Instructions.

    Happy streaming!

  • How to Mixed Reality: Handheld

    I previously gave detailed instructions on how to stream Fantastic Contraption in mixed reality with a stationary camera.

    People are starting to pick that up and it’s very exciting! Fantastic Contraption also works with a hand held camera and in this post I’ll show you how to use it. To record hand-held video you do need a third controller though, which is going to be a big barrier for most people.

    If you have a third controller and already have the stationary camera stream set up then hand-held setup is pretty simple:

    1. get a third Vive controller (this is the hard part)
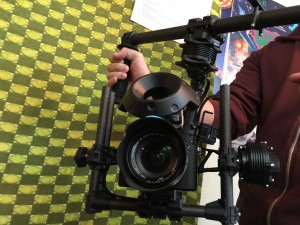
    2. duck tape that controller to your camera and plug it into the USB on your computer
    3. know where to put the camera/controller when you start hand-held mode
    4. turn on mixed reality and then hand-held mode in Fantastic Contraption
    5. align the cameras


    cam1. Get a Third Controller

    OK, yeah, this is pretty hard right now. Valve has said that they’re working on a way to get a third controller and also working on tracking devices that are designed to be added to real-world objects to make them trackable. At the moment the only way I know of to get a third controller is to borrow one from a second Vive. I have no other suggestions, sorry.

    2. Duct Tape

    The third controller tells the game where your camera is so the first thing you have to do is meld your controller to your camera. Make the coupling super solid so it doesn’t drift over time. Use duck tape, zap straps, putty, glue, whatever makes it nice and solid. Also make sure the sensors on the controller will be visible to the light houses.

    Now plug the third controller into the USB of your computer. Third controllers can not be used wirelessly like the controllers that come with the Vive. It will only be recognised if you plug it into a USB port on your computer. You’re probably going to have to buy a USB extension cable.

    cam2

    3. Why is my Hand the Camera?

    The game knows you have three controllers but it doesn’t know which one is tied to a camera. To work around this I assume that the camera controller is the one that is most “Vive East” when handheld mode is turned on. Vive East is the direction AWAY from the pink goal in-game. If you did room setup like Valve suggested then it is in the direction to the right of your monitor.

    4. Turn on Hand Held

    Go to the “Settings” menu and turn on “Handheld mode”. This will take the mixed-reality cameras and move them to where the third controller is.

    5. Align the Cameras

    You need to align the in-game and real-world cameras like in the previous guide. Use the wasdqe and arrow keys. Note that you can “roll” the camera with shift arrow.

    It’s also very important to get the camera delay correct when filming hand-held or the whole world will be swimming around.


  • How To Mixed Reality

    How To Mixed Reality

    How to Stream Fantastic Contraption in Mixed Reality

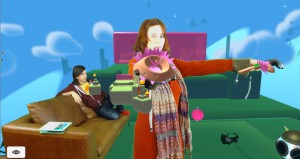
    We stream every Thursday at noon on Twitch and are really enjoying it. This is a great way to show people what it feels like to be in VR and is a unique way to stream games. Our techniques and equipment can definitely be improved on to acheive better quality.

    There are a number of ways to stream Fantastic Contraption, initially this guide will only cover full roomscale greenscreen streaming. You can probably devise other clever ways of streaming the game with what is covered in this guide.

    I’ve also written a guide on how to record Fantastic Contraption with a hand-held camera.

    There are a few broad sections to this guide:

    1. Studio setup
    2. Game setup
    3. Camera Sync
    4. The Director Functions


    1. Studio Setup

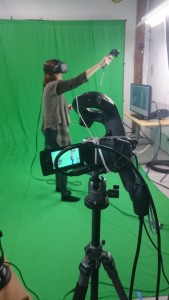
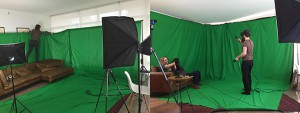
    Lets start with the hard part. Our studio has a footprint of 15×12 feet and our greenscreen is 81/2 feet high. This is basically our entire living room. This is a nice big space and gives us room to include a couch in the shot for guests. I think 8×12 feet would probably still be comfortable with a tighter shot and no couch. If you have less space you can always get creative.

    400sqft of green muslin blankets our livingroom

    The green screen setup isn’t that hard. You just need a bunch of green screen fabric and a couple big racks to hold them. You’ll also need some lights, a camera and a mic. Sarah made up a handy shopping list of all the stuff we bought.

    -> Sarah’s Shopping List <-

    All told it cost is 1000$-1200$ CAD. It will cost you less in the US.

    A quick note on webcams: a webcam that is great at a meter will be terrible at 4 meters. They are designed to take in a person sitting at a desk and are terrible at filming a whole room. We spent 300$CAD and bought the cheapest Sony handycam that does 1080p 60fps HDMI out and a 200$ capture card which much improved the quality. Of course you can always spend more on cameras. (we also tried a dslr but they are extremely finicky to get streaming well). The camera and card are listed in the shopping list.

    So hang your green screen, set up your mic, and plug in your camera.


    2. Game Setup

    Note that there are two ways to do game setup. If you’re using an HDMI Camera or want to do the compositing in post go here. If you’re using a webcam read on.

    • Start the game holding shift while opening the game in steam. This will open the resolution options. Set the game to open full screen at the resolution of your  monitor.
    • Open the “Settings” menu (you might also have to hit the eye button to open the left-menu if it’s closed)
    • Turn on “Enable director controls”
    • Under the “Select Webcam” dropdown select the webcam you want to use. If it doesn’t appear or doesn’t work use these instructions
    • Fiddle with the “Key Threshold” and “Key Step Range” sliders until your green screen looks good (also set the chroma key colour if your backdrop is a colour other than green)

    3. Camera Sync

    • The last thing you have to do is sync the in-game camera with the real world camera. This means moving the in-game camera to where the real-world camera is and setting the in-game camera Field of View to match the real-world camera. This is all done very manually.
    • Put on the HMD and grab the in-game camerabug – that’s flying eyeball which indicates where the virtual camera is. Peek out from the HMD so you can see the real-life camera at the same time, and drag the camerabug over so that they are in the same place.
    • Next use the keyboard wasd keys (as well as q & e for up & down) to fly the camera around and make small adjustments. Use the arrow keys to change the angle the camera looks. Shift arrow will “roll” the camera.
    • This is easier with another person to help. Have them pick up the two controllers and walk to the back of the play area. Get them to hold out their arms in a T-pose and then not move. Using the arrow keys change the angle of the camera until the controllers are as close to matching the real-world controllers as possible.  Note that the FOV may still be off so you won’t get a good match.

      Using hand controller positions to align the cameras
      Using hand controller positions to align the cameras
    • To match the FOV, open the settings menu and drag the “3rd person FOV” slider until the in-game controllers are the same distance apart as your friends (very tired) arms.
    • After setting the position and FOV set the “Camera Delay” slider. You will notice the camera lags behind the game as the player moves around. This slider will delay the game so it can match the delay of the camera. Drag this slider until the game and the player are in sync.
    • You are done setup! Because of lighthouse drift and camera jostling you will probably have to re-tune this every time you stream.


    4. The Director Functions

    There are a number of camera controlls that can be used by the person in-game or by a spectator using a keyboard.

    When you turn on Mixed Reality mode you will see these camera buttons somewhere in the game.

    You can select between different cameras by pointing at a button and pulling the trigger. A person outside VR with a keyboard can switch between cameras by pressing ~1, ~2… ~6

    When you’re in the game each camera is represented by a little flying insect. You can grab the insect to move it around. A person with a keyboard can fly around to get a better view of the levels and the contraptions using wasdqe and arrow keys.

    The cameras are each a little different:

    • ~1 is the POV of the player
    • ~2 is a 3rd person camera
    • ~3 is the mixed-reality camera
    • ~4 is another 3rd person camera
    • ~5 is a camera that always looks at the player
    • ~6 is a camera that always looks at the goal ball

    We have some keyboard shortcuts that are fun to use while streaming:

    ~C will hide the hand controllers. If you are affraid you’re going to start flying the mixed reality camera around by accident you can select it and then hit ~L to lock it in place.

    You can change the avatar of the player (visible in 3rd person camera) with ~A. It will cycle between all available avatars (my favorite is the pink unicorn!)

    You can give the player a hat with ~F!


    Happy Streaming!

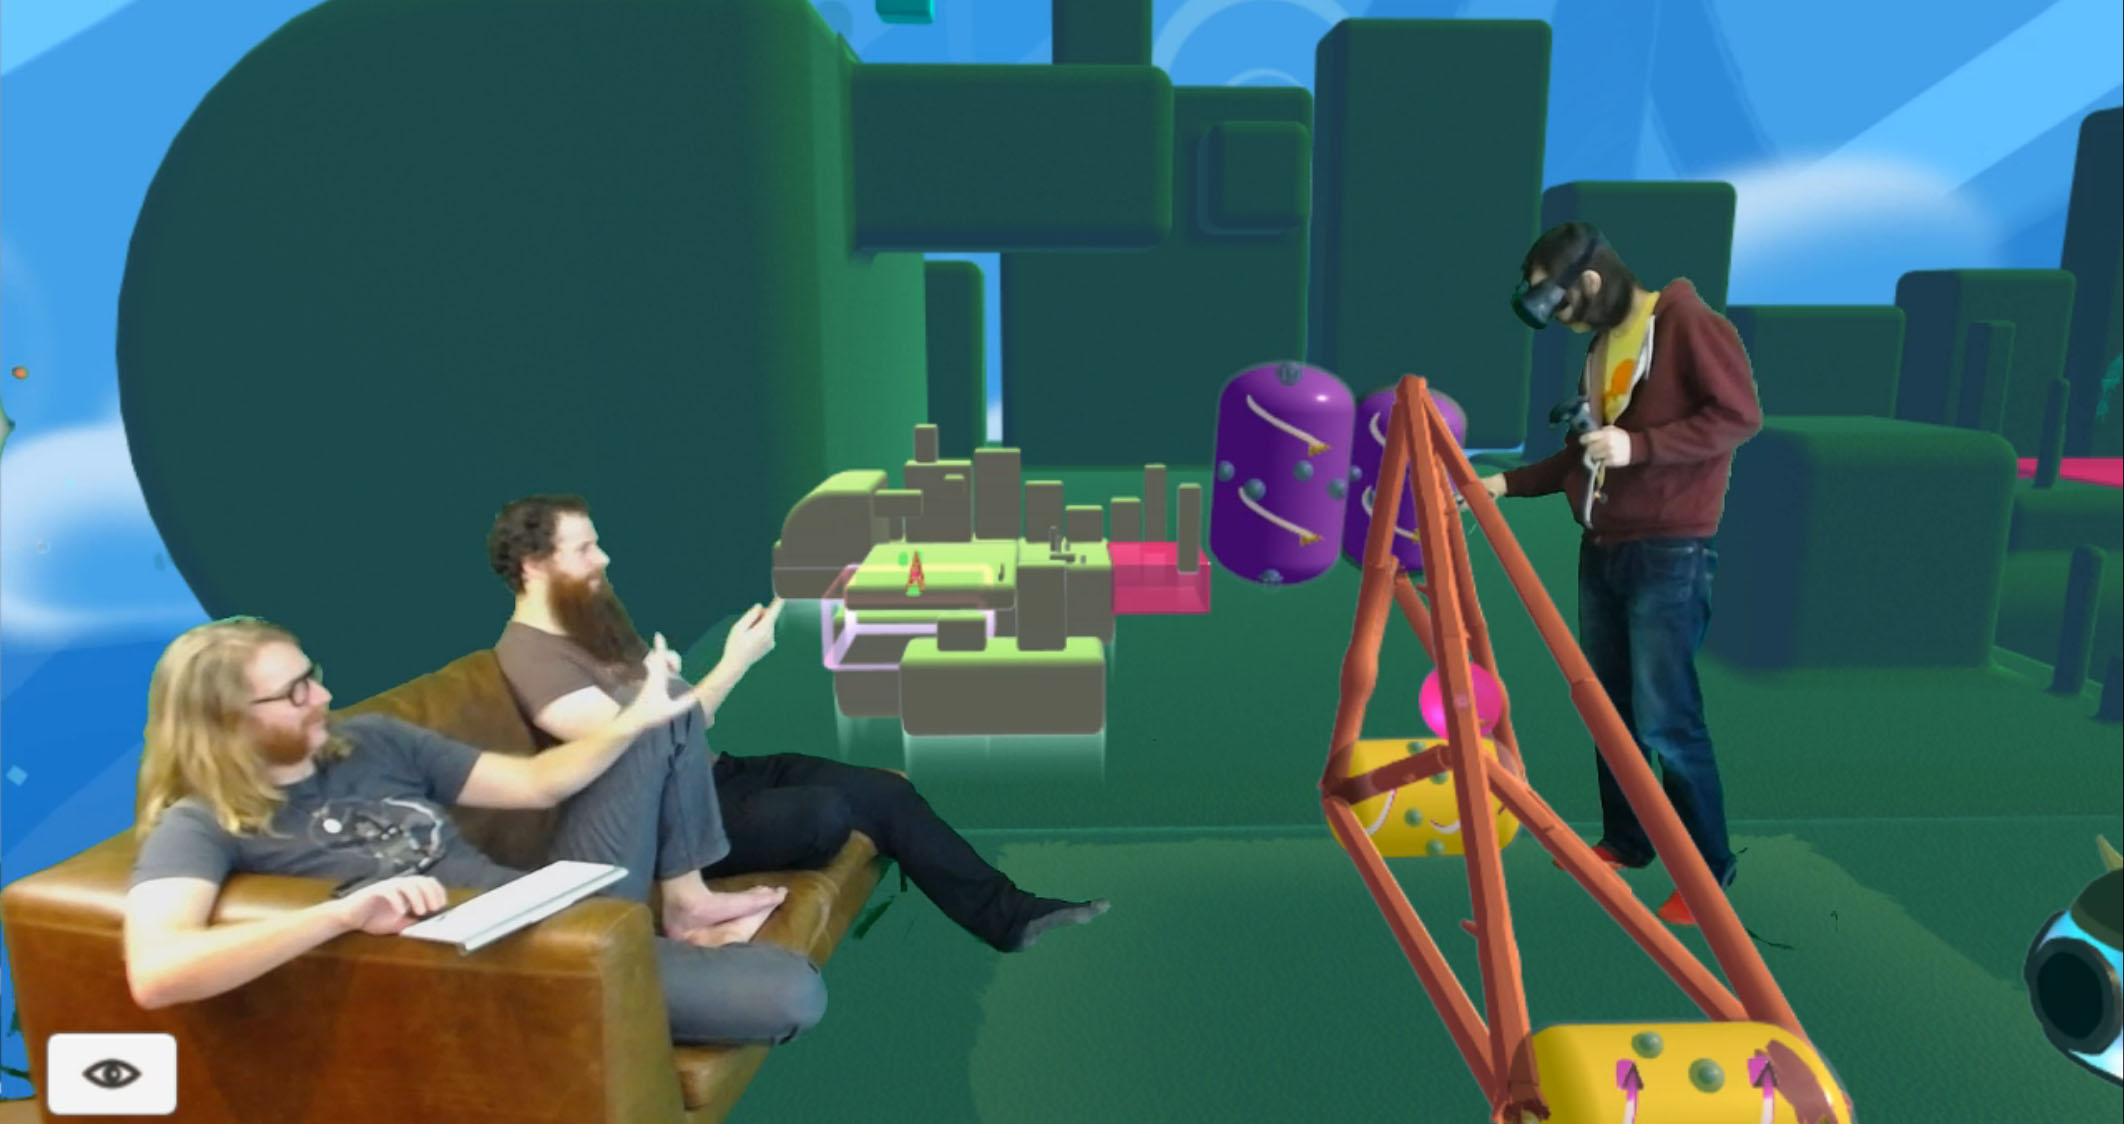
    Lindsay builds while couchies Gord and Colin advise

  • Becoming a Nomadic Game Dev: How to Travel

    Since 2010 Sarah and I have been traveling the world while making video games. We’ve written and shipped Rebuild 1, Rebuild 2, Incredipede and Deep Under the Sky entirely while traveling. We’re currently both working on Rebuild 3. There are a few questions we are often asked about our work/travel so I decided to write out a how-to. Or at least, talk about some lessons we’ve learned. Might as well start with the one true secret of making travel and work happen:

    The One True Secret to Working While Traveling Is…

    Spend at last a month in one place

    We do one to three months everywhere we go. This is important because if you spend less than a month somewhere you won’t get any work done. There will be so much to do and see the pressure to do do and see it all before you leave will overwhelm you. You need time to get into a groove, you need time to let the excitement of being in a new place fade into the joy of experiencing a new culture. It’s like visiting an art gallery for the second time. You see more nuances, you start to see how it all fits together.

    There are other advantages to slow travel, like that it’s cheaper.

    We spend between 1000$-2000$ a month on rent when we travel. We usually get an entire apartment or house to ourselves for less than a hotel would cost. I am currently sitting under dappled shade looking at Sarah’s reflection in the pool of our two-bedroom house in Cape Town which we pay 1300$ a month for. I can hear the waves breaking on the beach and can’t see any neighbours because the property is so well treed. This is better than any hotel anywhere. You also get a kitchen which means you don’t have to eat out all the time and you can spend less on restaurants.

    AirBnB is your friend here. It’s an easy way to find long-term rentals. Write people who don’t show a discount for long-term stays, they probably just haven’t considered it yet. Also dig around off of AirBnB, some places still have thriving local rental websites.

    Airfair is less when you travel slow. Say you fly to Japan for 1500$, that 1500$ goes a lot further if you spend three months in Japan and then three months in Thailand before flying home.

    Also, traveling slow is just better. You get to make local friends and get a feel for what a place is really like instead of bouncing between toursit attractions.

    The Only Piece of Planning Ahead You Need to Do

    Is to find an apartment/house for the time you’re staying. Everything will fall into place when you get to your new home. If you have a place to live you can figure out the rest. Remember that you are often competing with vacationers for these places and vacationers tend to plan ahead so you will have to as well. We like to plan six months in advance (this also goes for flights).

    That being said, chosing and booking a place encapsulates a lot of other decisions. The important things in choosing a place are…

    Internet, internet, internet

    This is the most important part of any housing decision you make. Tripple check that the house has a functioning internet connection. Depending on what you’re working on you might not need a very good one. Sarah and I have gotten by on pretty terrible 3g cell connections for months because we weren’t working on games that required assets to be passed back-and-forth or big binaries to be uploaded to Steam. If you’re collaborating with a remote team and putting emergency builds up online all the time you’ll need a beefy connection. If you’re just spending three months doing prototyping you might not even need the internet.

    Whatever your internet needs are confirm specifically over email that the house has the connection you need, then confirm it again. If you need a reasonably good connection then ask the house owner if you can stream YouTube and Skype reliably, these are questions non-technical home-owners can answer.

    Honestly, if you have a decent internet connection you could live in a box with no windows and still have a pretty high quality of life so this is the big one. It’s also the only thing you can’t really fix after you get to your new home so make sure it’s what you need beforehand. (in practice we often have to make alterations to the internet setup, we travel with a small router we sometimes use as a repeater).

    Location, location, location

    This is the most fun question to answer: Where you gonna go?

    The answer to this is obivously: That place you’ve always wanted to go!

    If there’s one place you really desperately want to go (say Istanbul) then get on the internet and track down a place to live. Use AirBnB but also do web searches, hunt around for a while, write a lot of emails to landlords. Some of the best places we’ve stayed were secret little gems or places with much higher prices that we negotiated steep discounts for (it’s a pain in the ass for renters have new people comming in and out all the time so a lot of people welcome long-term rentals with open arms).

    If you’re more open about where you want to go (say Costa Rica) then I like to find a nice house and then let that determine what city we live in. When we stayed in Greece I searched all of Europe on AirBnB for a cheap place with a view of the mountains and the sea. We found a nice little house in a mountain village on Thassos and had one of our best trips.

    Don’t forget to read the AirBnB reviews! Some countries (I’m looking at you Brazil) have a culture of exageration.

    The Other Stuff

    Some other things to consider when you pick a place are:

    • Safety, do a google search, are you going to feel comfortable in the neighbourhood?
    • View, you want to like being in your new home so you can stay home, work, and be happy. A nice view helps.
    • Transit, can you walk/bus everywhere you need to get? You won’t have a car.
    • On-site Landlords, nearness to friends or other indies. It’s nice to have locals who can help out

    The transit point might be less important in some places. We’ve stayed in a lot of very remote places and there’s always SOME way to get groceries. You might just have to walk eight kilometers along a beach or take kayaks through some mangrove tunnels.


    You Have Your House, Other Considerations

    There basically are none. If you have a house with the internet and money in the bank anywhere in the world then you’re pretty much good.

    There is some basic stuff like:

    • Check what entry/visa requirements the country has BEFORE you book a place or get plane tickets
    • Figure out how to get from the airport to your new place (landlords that pick you up are the BEST!)
    • Get the necessary vaccinations at a travel clinic if you’re heading somewhere tropical
    • What’s the banking situation like? If you’re really remote you might have limited access to ATMs (you’ll just have to take out lots of cash occasionally)
    • Travel Insurance, get some travel health insurance, you want to be in a strange country’s hospital AND worrying about the cost of healthcare?

    There are also things you shouldn’t worry about:

    • Language, you’ll muddle through
    • Where you’re going to get groceries, if people live there then there is food
    • Street Food, you’re there for a month, you can afford to mabey get sick for a couples days
    • Rainy Seasons, you’re there for a month, so what if it rains for half the days, you have work to do


    The Downsides

    If you are looking at the above “don’t worry about” list and getting scared then mabey you should think twice about this whole thing. Traveling is going to require patience, flexibility, and privation. You might have to completely change your diet. Buying the simplest things may be a challenge. The transit system will probably make no sense at all. Imagine you have been throwing up and haven’t slept well for three days, you walk for three hours to the pharmacy because you can’t figure out the bus sytem, when you get there you ask for a specific brand of medicine and instead of simply grabbing it and handing it to you the pharmacist asks you a question in a foreign language and just stares at you. This is the downside of the unfamiliar.

    If you’re shy, a picky eater, picky about matresses, don’t like public transit, scared of people not like you, tend to freak out when anything goes wrong, can’t adapt to new situations, or are not a generally calm and welcoming human being then prepare to be seriously challenged.

    Also, homesickness is real. Our first long-term trip was to Thailand in 2006 for six months, the first month was exciting, the second was uncomfortable and the third was I-want-to-go-home misaerable. The fourth through sixth were great! Homesickness goes away and varries from person to person but it can be emotionally brutal, be ready for it.

    Another serious issue is loneliness. Sarah and I are extremely lucky to be able to both work from anywhere.  Traveling long-term on your own is going to be much more challenging than travelling with a partner and way less fun. Sometimes you can make friends with locals, sometimes you can’t. Here is where going to GDC is going to help you. If you’ve already made friends with a bunch of people in one city or another then that might be where you want to head. I’m not talking about talked-to-them-once-at-a-bar aquantences here. I mean people who you know well and are eagre for you to come.

    I’m also going to put the disclaimer here: if you book a non-existant house in Somalia and get yourself kidnapped it’s not my fault! This all represents my experiences and doesn’t represent the full posibilities of what can go wrong while wandering the earth.


    The Upsides

    Downsides suck :(  But they are all worth it! With no challenge you wouldn’t grow as a person and travel wouldn’t mean as much. When you’re walking down a deserted tropical beach trying to solve game-design problems, talking angrily about bugs you can’t squash in a dark pub with new friends, or just sitting at your laptop staring out at some strange foreign place you will know it’s worth it.

    And the world-wide network of indie devs is amazing! Most major cities have someone you can meet up with for a beer and get some advice on how to see the city.

    You can work from anywhere, you have friends everywhere, explore!