Originally posted to GameDeveloper.com in August 2022:
How a Unity scene with 1600 lights was optimized for consoles.
Taking a game from Unity prototype to Switch and PlayStation can involve compromises, but what you need most are some good tricks and custom shaders. Our narrative deckbuilding RPG I Was a Teenage Exocolonist is set on the alien jungle planet Vertumna, which you run around and explore as you grow up. I was still getting to know Unity when I created these outdoor scenes, and mistakes were made. But over five years I learned how to make our complex outdoor scenes fast and efficient.
I’m Sarah Northway, co-founder of Northway Games and creator (/designer/coder/co-writer/art director) of I Was a Teenage Exocolonist, as well as the narrative city-building series Rebuild and other games. I work with different artists for every game, from Flash browser games, to mobile, PC, VR, and now consoles.
I might be best known for traveling the world with my husband for five years when we first went indie. It was the jungles of Central America and the coral reefs of Southeast Asia that inspired Exocolonist’s lush landscapes and focus on the natural world.
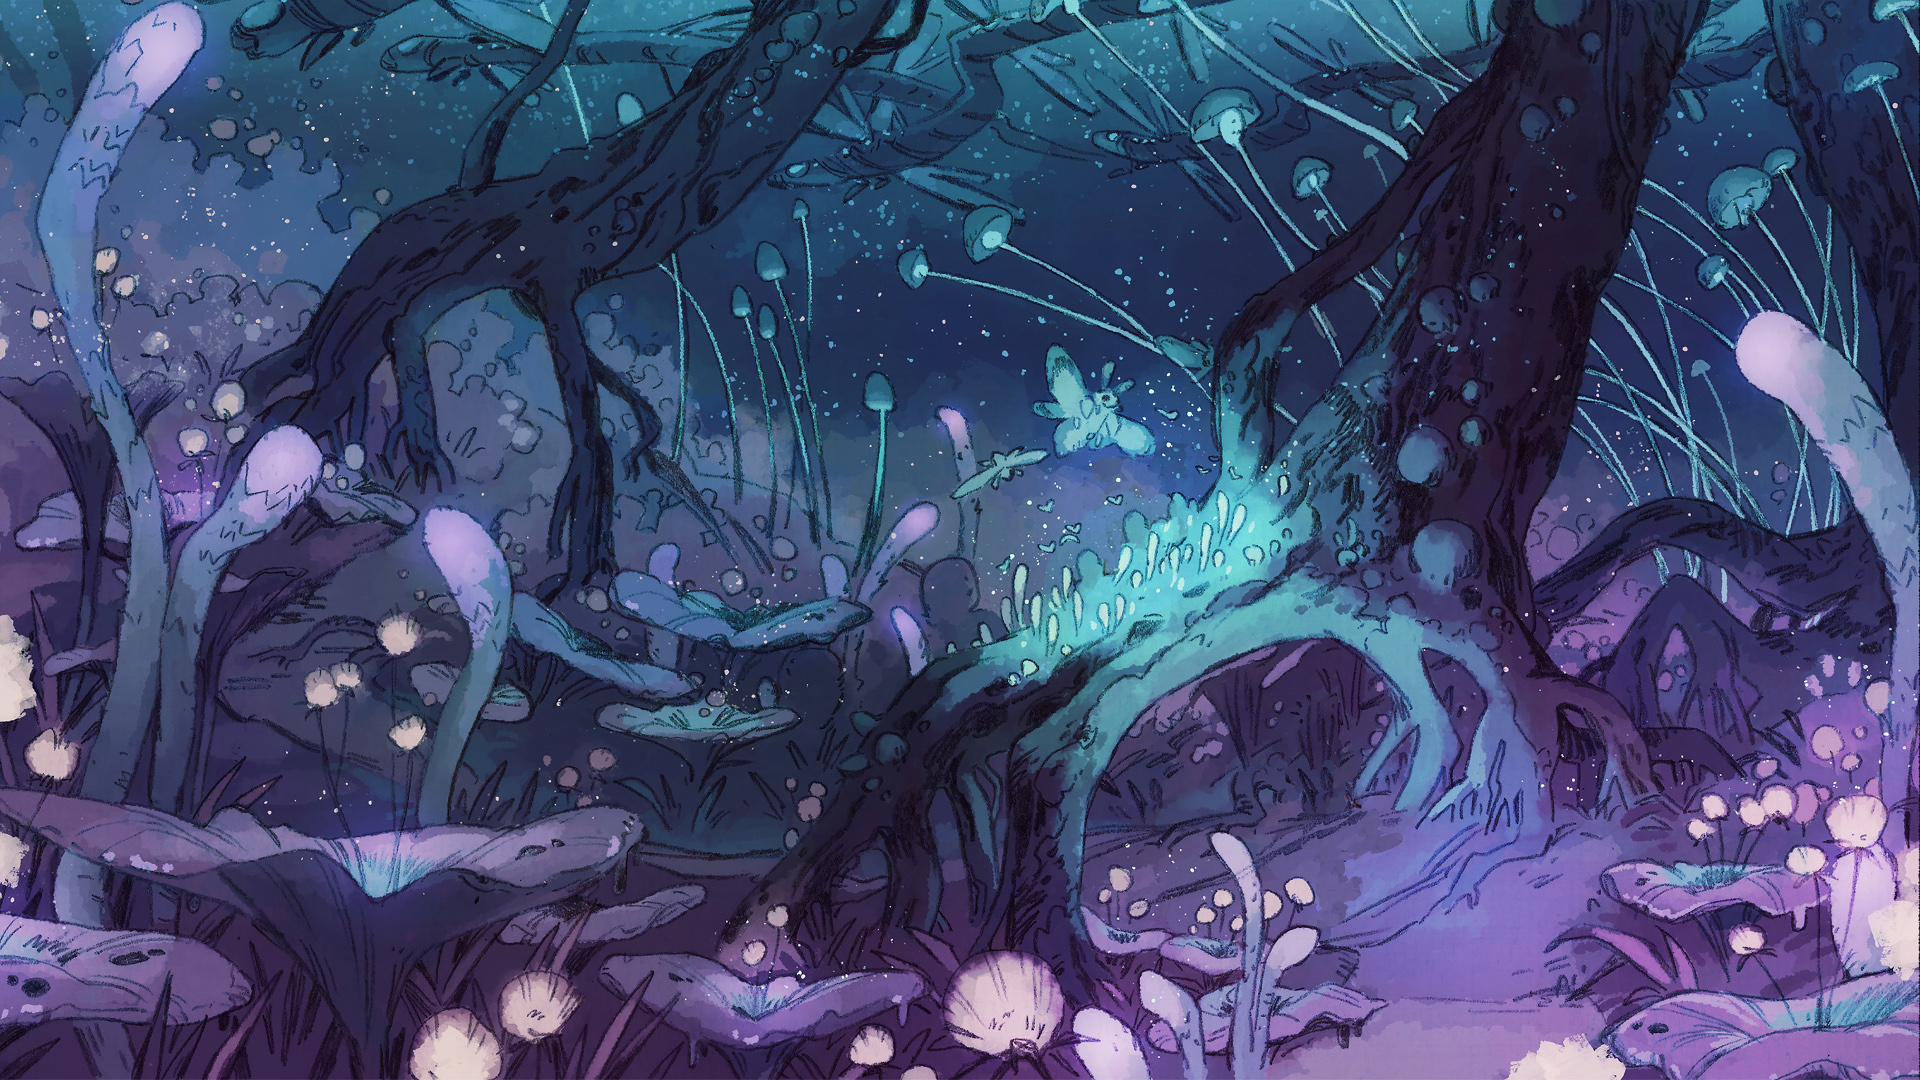
To bring this world to life, I worked with concept artist Sarah Webb, illustrators Meilee Chao and Eduardo Vargas, and 3d modeler Sarah Roland on our beautiful outdoor scenes.
Quiet, Pollen, Dust, Wet, Glow
In the main colony region, all the plants, terrain textures, and weather effects change with the season. Some plants have yearly lifecycles, growing taller or flowering then returning to buds. 3d elements like rocks and colony walls are tinted to match the weather, which includes rain, snow, heat shimmer and clouds of pink pollen.
Our seasons have cute names (Quiet, Pollen, Dust, Wet) but are roughly equivalent to winter, spring, summer, fall. There is no night cycle, but during the fifth season, Glow, Vertumna’s two suns are below the horizon for several weeks. During that time, nature comes alive with firefly-like particles and light-emitting plants.
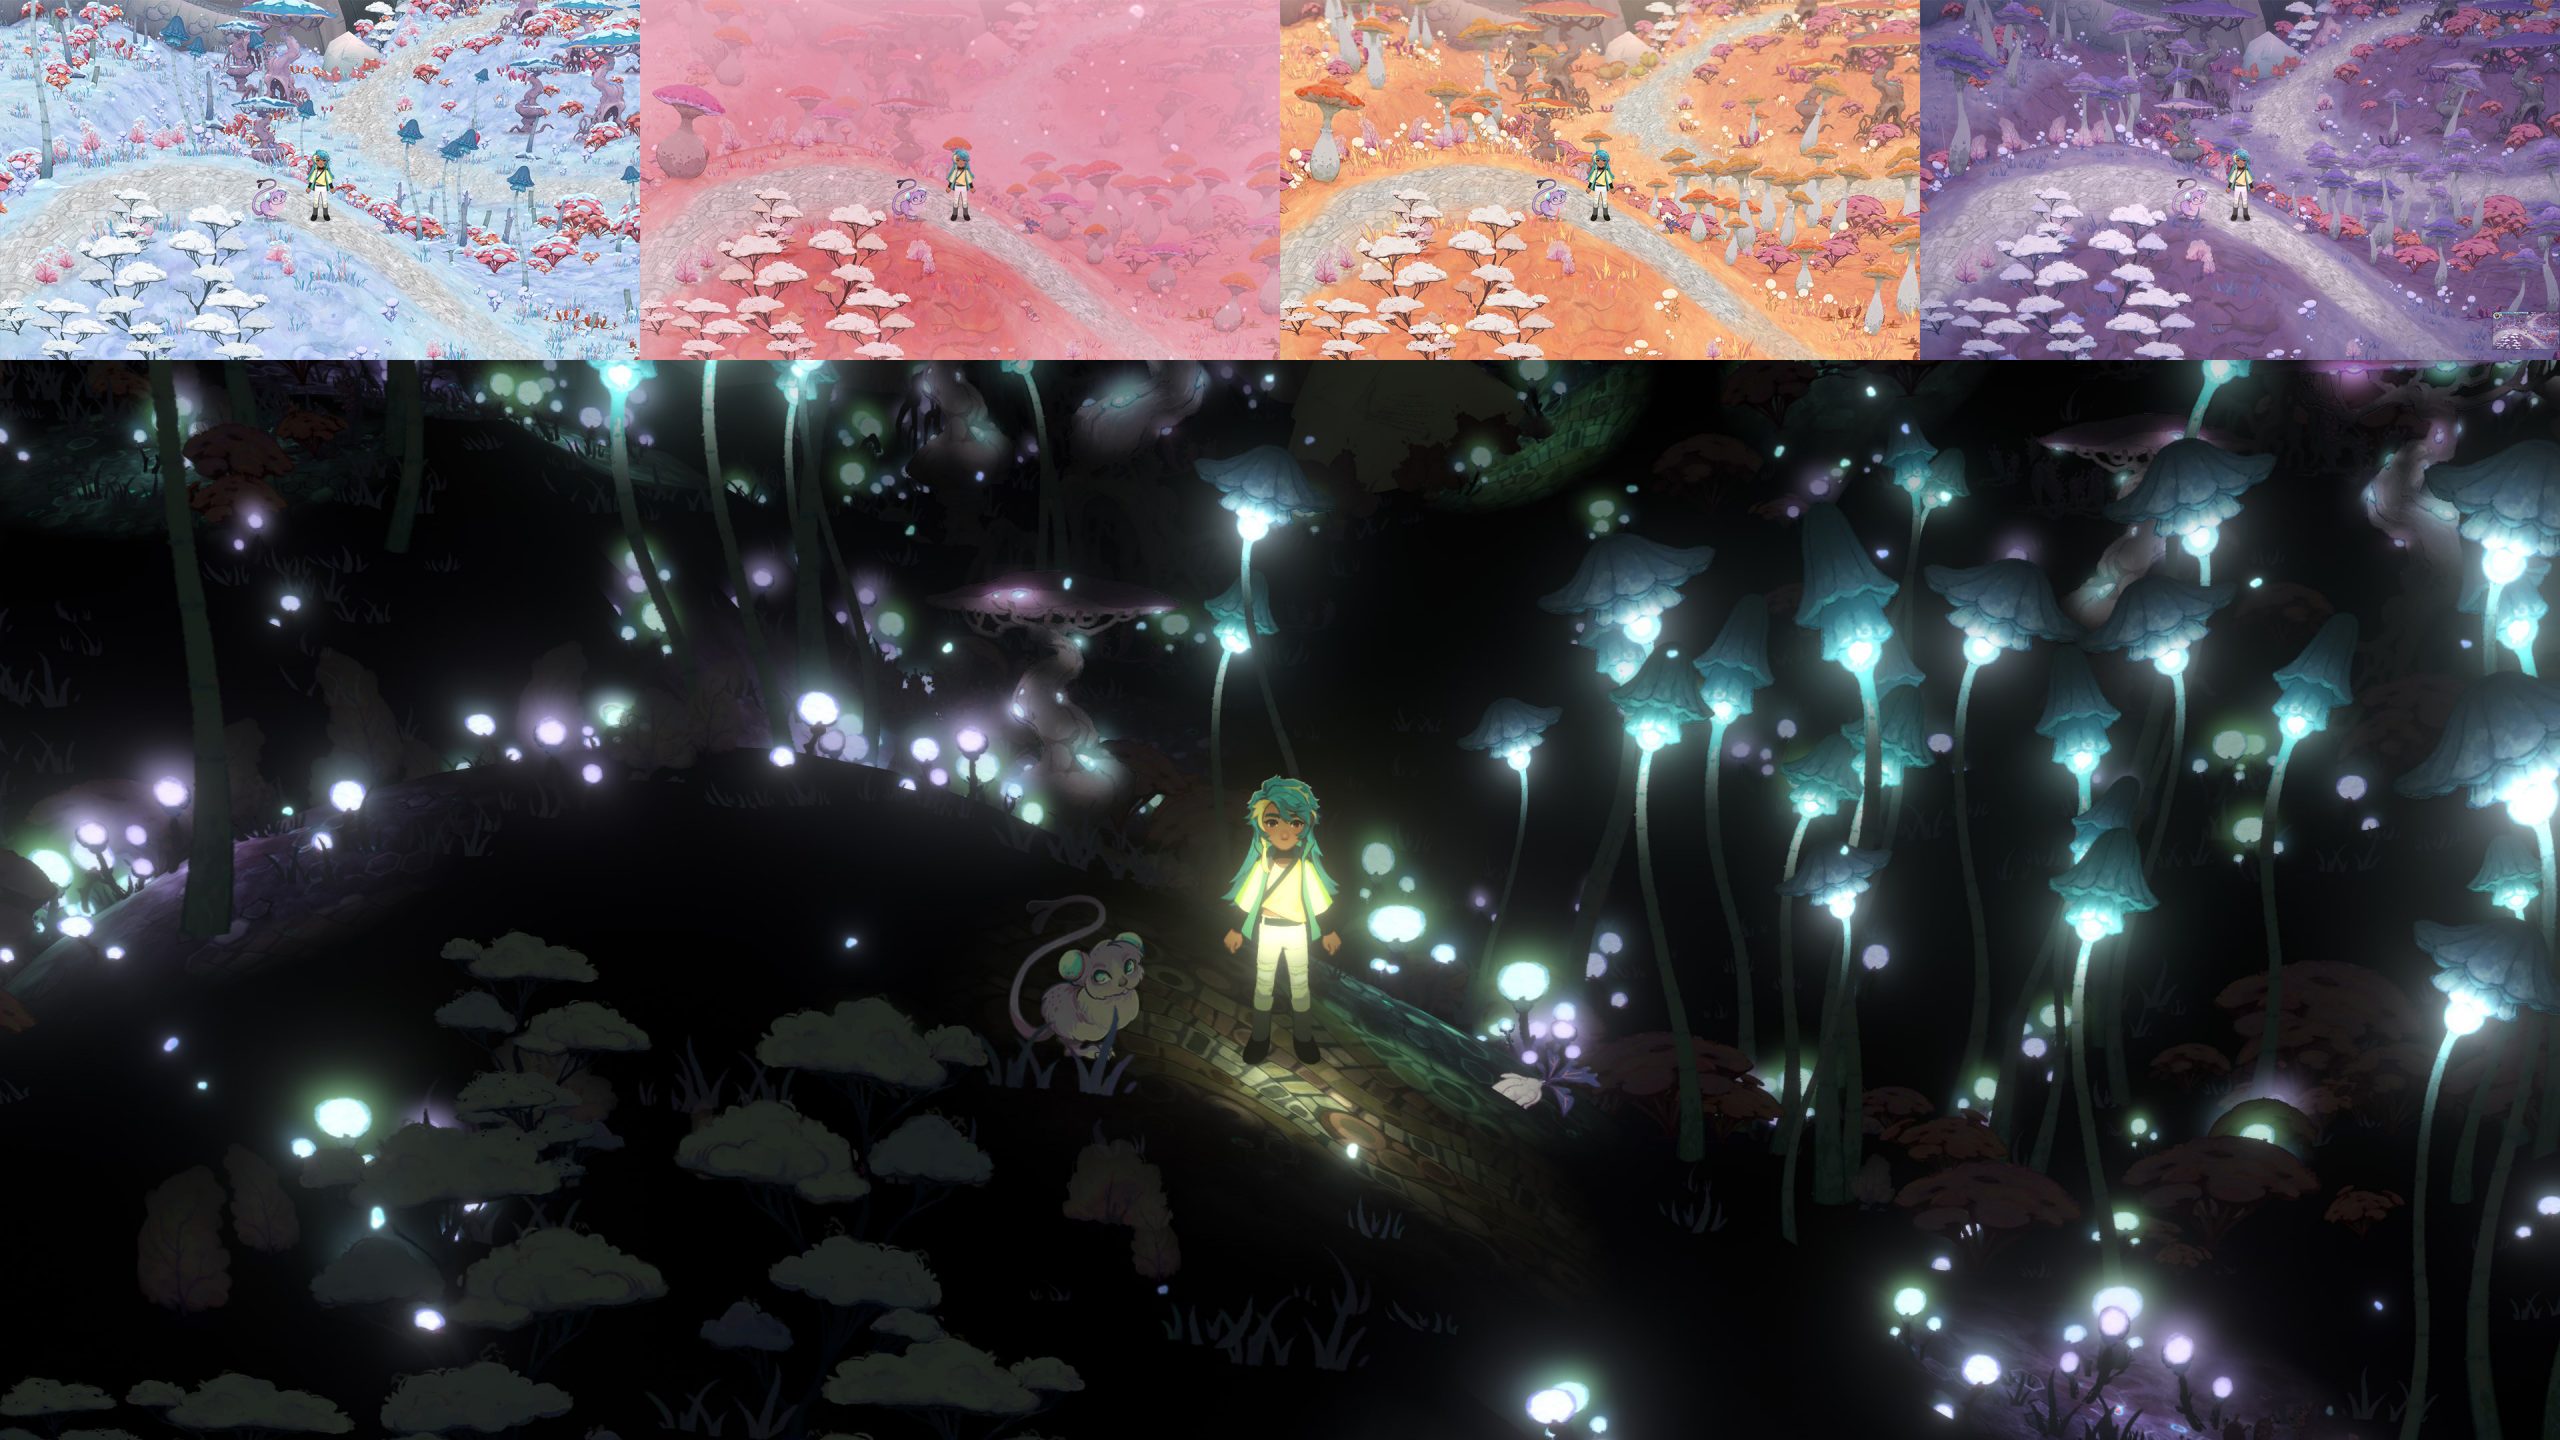
Exocolonist’s lighting is flat with only painted-in shadows, no normal maps or specular sheens. I used the built-in render pipeline and forward rendering to layer hundreds of semi-transparent Sprite-based plants. The Terrain uses a tri-planar shader and swaps its TerrainLayer textures when the season changes. 3d rocks have soft gradients applied based on their orientation, and plants and other 2d objects are billboarded to face the camera. The overall effect is of a painting come to life.
During Glow season, the colony gates close, characters hide indoors and the lights come out, all toggled by Components that enable or disable child objects based on the season.
There. Are. 1600. Lights
Here’s where things got complicated. Some plants emit light in Glow season: the bobblesprouts, mushtrees, and gnarlwood. Naively thinking “Unity will handle this for me”, I initially just embedded point lights into every plant prefab, which I toggled on or off based on the season.
The result was 1600 lights in one scene, up to a thousand at a time in the camera’s field of view, all affecting each other, the ground and the player. It was glorious.
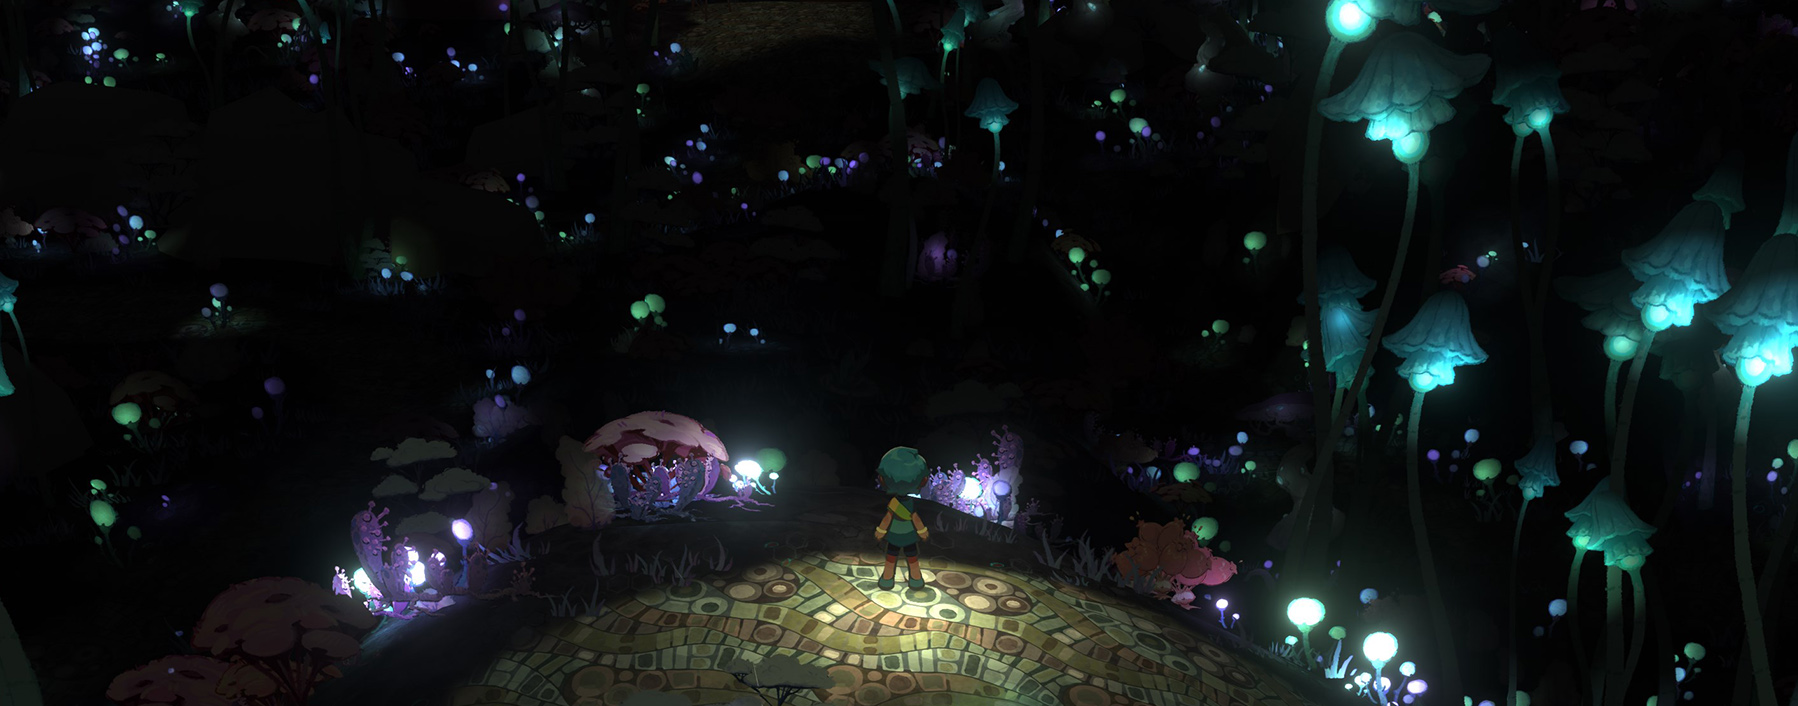
Glorious and slow. I cranked the concurrent pixel light count to 20 for screenshots (default for “Fantastic” quality is 4). The scene above was performing 6000 draw calls per frame, most with multiple lights, and ran at roughly 1 fps on my target low-end PC.
Batching Plants Blanches Pats
Let the optimization begin! I considered Unity’s tool for adding grass sprites to Terrain, but I couldn’t get the control I needed. Instead I dove in to custom shaders and prepared to batch the plant draw calls by tossing their art into an Atlas together.
I wrote editor tools to place a variety of plants in an area at once, clumping based on species parameters, avoiding duplicate art too close, and randomizing their angles and sizes. Then I tweaked them by hand to compose little vignettes.

Every plant is an individual object in the scene, rippling, bobbing, and bending when the player walks through it. Some species swell up and seem to breathe, showing the thin distinction between flora and fauna on the planet Vertumna. But they all use a single material, and up to a thousand can be rendered with a single forward-pass draw call.
To do this I used a custom vertex shader based on Unity’s default Sprite shader. Unity threw a wrench in by not supporting custom material property blocks on SpriteRenderers, so I passed the values I needed to calculate plant movement through the unused RGBA channels of SpriteRenderer.color. I was simultaneously horrified at my terrible hack, and pleased with how efficient it was.
Shader programming in a nutshell.
Batching took scenes down from 6000 draw calls to about 6. Next, I removed the Light components from the plant prefabs, and removed Unity’s lighting from the vertex shader. I wouldn’t need these where I was going.
Bloom
I stopped tinting the plants black via scene lighting, and instead I baked the tint in using Photoshop. Only the light-emitting parts of the plants are fully colored, and a murky fog tints distant ones. Then I started adding Post-process effects.
Everything looks better with Bloom and HDR, it’s a fact. I pushed it too far, then brought it back one notch. This gave the bobblesprouts and mushtrees the impression of emitting light into the world around them. And the geodesic greenhouses look fab.
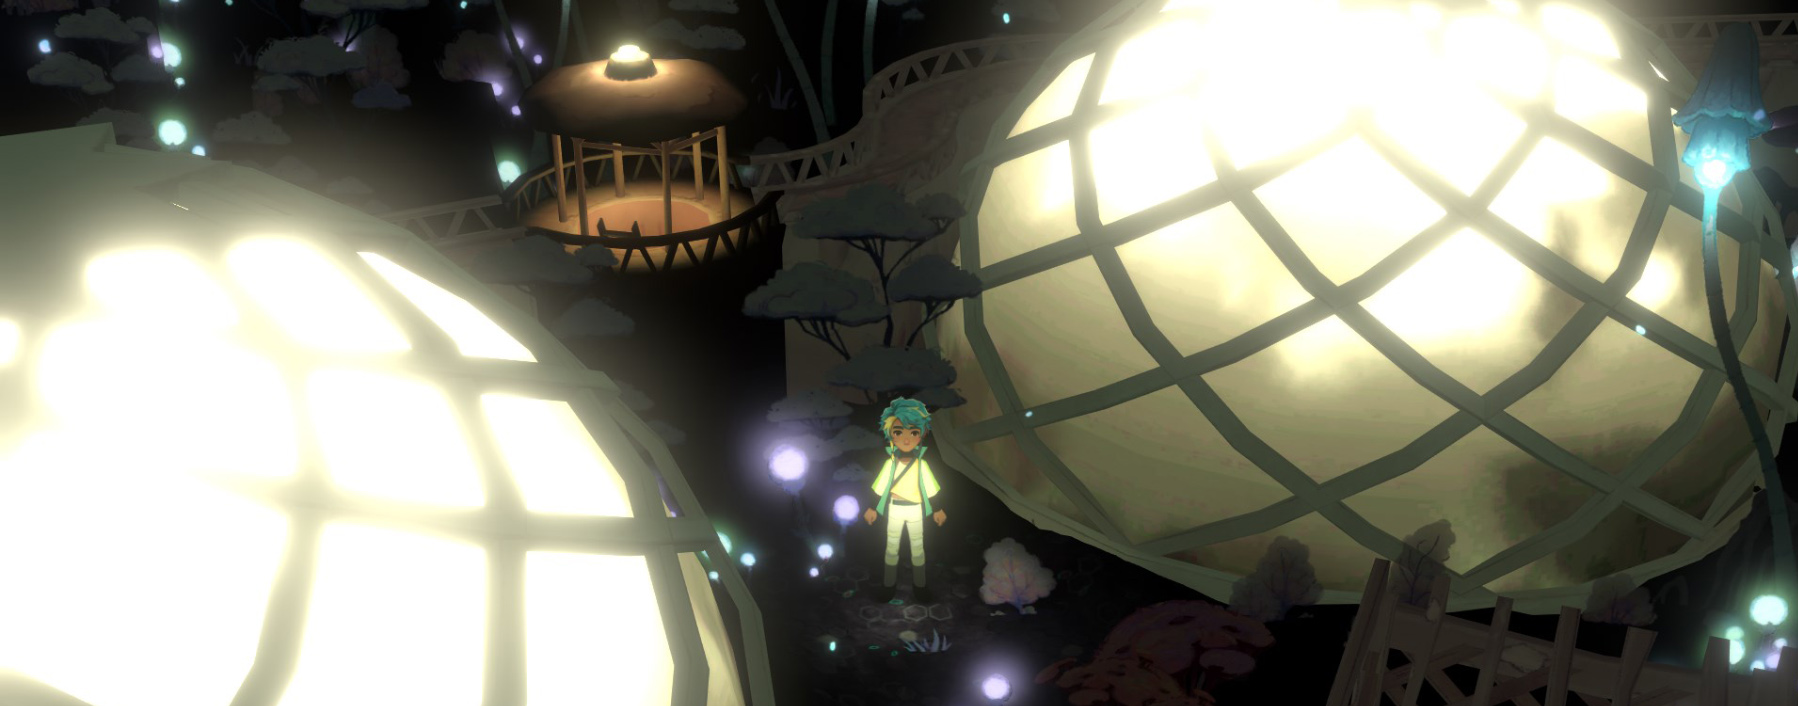
HDR porting gotcha: We had an issue on the Nintendo Switch with our post-process highlighting effect, which draws a glowing outline around interactive objects when you’re near them. We were using the alpha channel to store hidden info about the edges of objects, but with HDR enabled, the Switch ignores alpha during post-processing to save bits for the R, G, and B channels. To fix this we had to disable HDR on Switch, then adjust for the lower-bit alpha (even with HDR disabled, alpha is capped to 1). Luckily this was our only tricky rendering issue during porting.
Bake it Till You Make It
For the greenhouses and spaceships, I used an emissive texture map to layer additive light over a regular texture. Exocolonist’s 3D objects all use the same custom surface shader which includes Unity lighting, with soft Lambert shading and few shadows. But rather than render most lights on the fly, I switched to Unity’s baked lighting system.
After taking all 1600 lights out of the plants, I still wanted key areas of the ground and buildings to be lit by glowing flora. So I added back in baked lights here and there, matching the plants’ glowing colors. I did the same for the artificial lights on the colony walls and beside doors while I was at it. Only a few watchtower spotlights are still realtime, so they can illuminate the player and other characters moving under them.
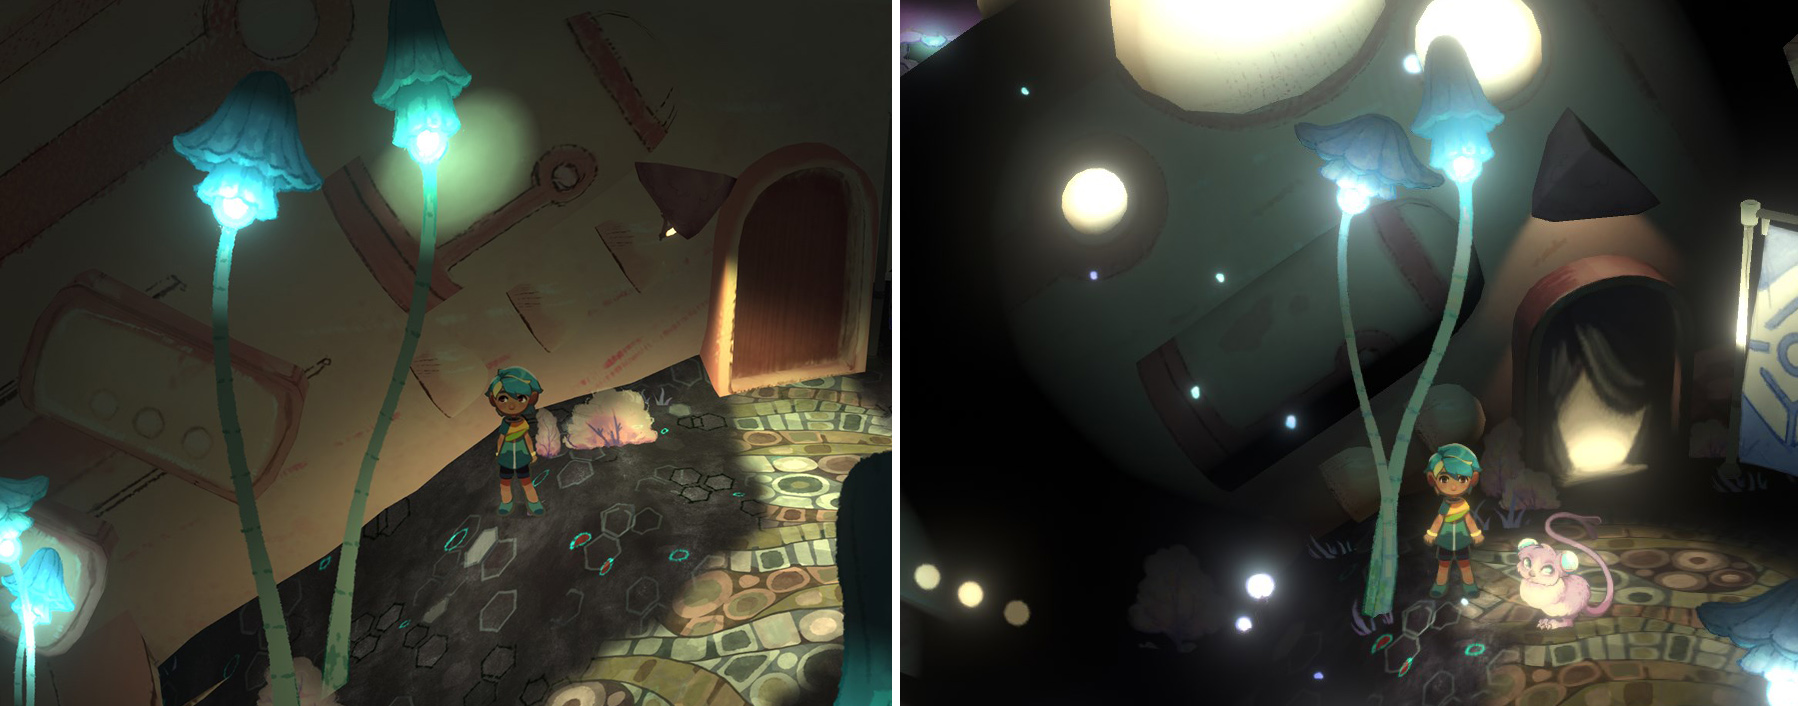
The Baked Lightmaps system creates textures based on light positions that can later be additively applied to 3d objects while the game is running. As usual with optimization, I was trading increased ram (3-5 extra textures in memory per scene) for faster processing time. What made this possible was using Addressables to store most of our art in the filesystem when it wasn’t being used.
One catch: lightmaps had to be disabled when the seasons changed. I added a component to 3d objects which remembers their Renderer.lightmapIndex and sets it to -1 when not in use.
The Lightbearer
The floating particle effects just worked, they’re mad efficient out of the box. My only optimization was to make their world-space emitter a limited size volume that follows the player around.
But the player character still needed one final touch: a dynamic light they “hold” which illuminates everything they walk near – ground, plants, structures, and characters.
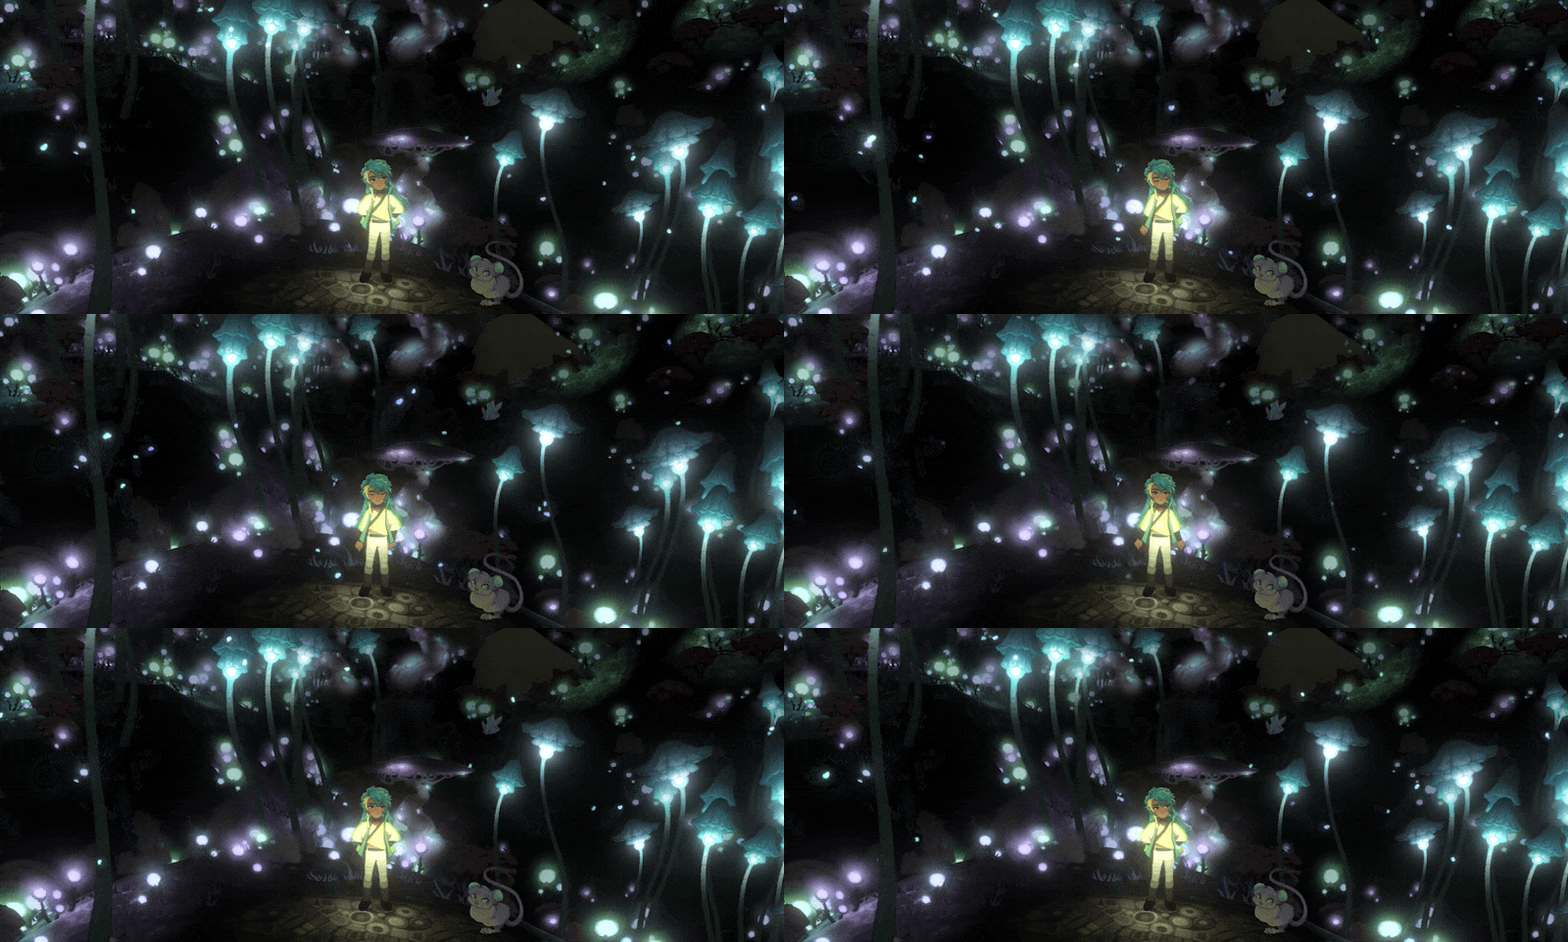
I played around to find an efficient way to do this. Since the plants already knew the player position to be able to bend out of their way, I used it to calculate the light in my vertex function:
o.playerLightColor = fixed4(1, 1, 1, 1);
if (_IsGlowSeason) {
	float3 playerWorldPos = _PlayerPos.xyz;
	float3 vertexWorldPos = mul(unity_ObjectToWorld, v.vertex);
	float distToPlayer = distance(vertexWorldPos, playerWorldPos);
	float lightRadius = 3;
	float lightPower = (lightRadius - min(lightRadius, distToPlayer)) / (lightRadius + 0.001);
	o.playerLightColor = fixed4(0.82, 0.80, 0.73, 1);
	o.playerLightColor.a = lightPower * 10;
}
The playerLightColor is then added in per-pixel during the fragment or surface method. I update _PlayerPos via Shader.SetGlobalVector as the player moves, and _IsGlowSeason when the season changes.
The Result?
Well, it’s a whole hecka-lot faster now! Glow season is a smooth 60fps on most systems.
I was ready to have to rewrite the reflective water shaders or downres our textures to 2k for Switch, but it didn’t come to that. Once Glow was settled, most of our porting woes involved controller support, ugui menus, and save timing. Oh, and being forced to upgrade Unity at the 11th hour (you’ve been warned!).
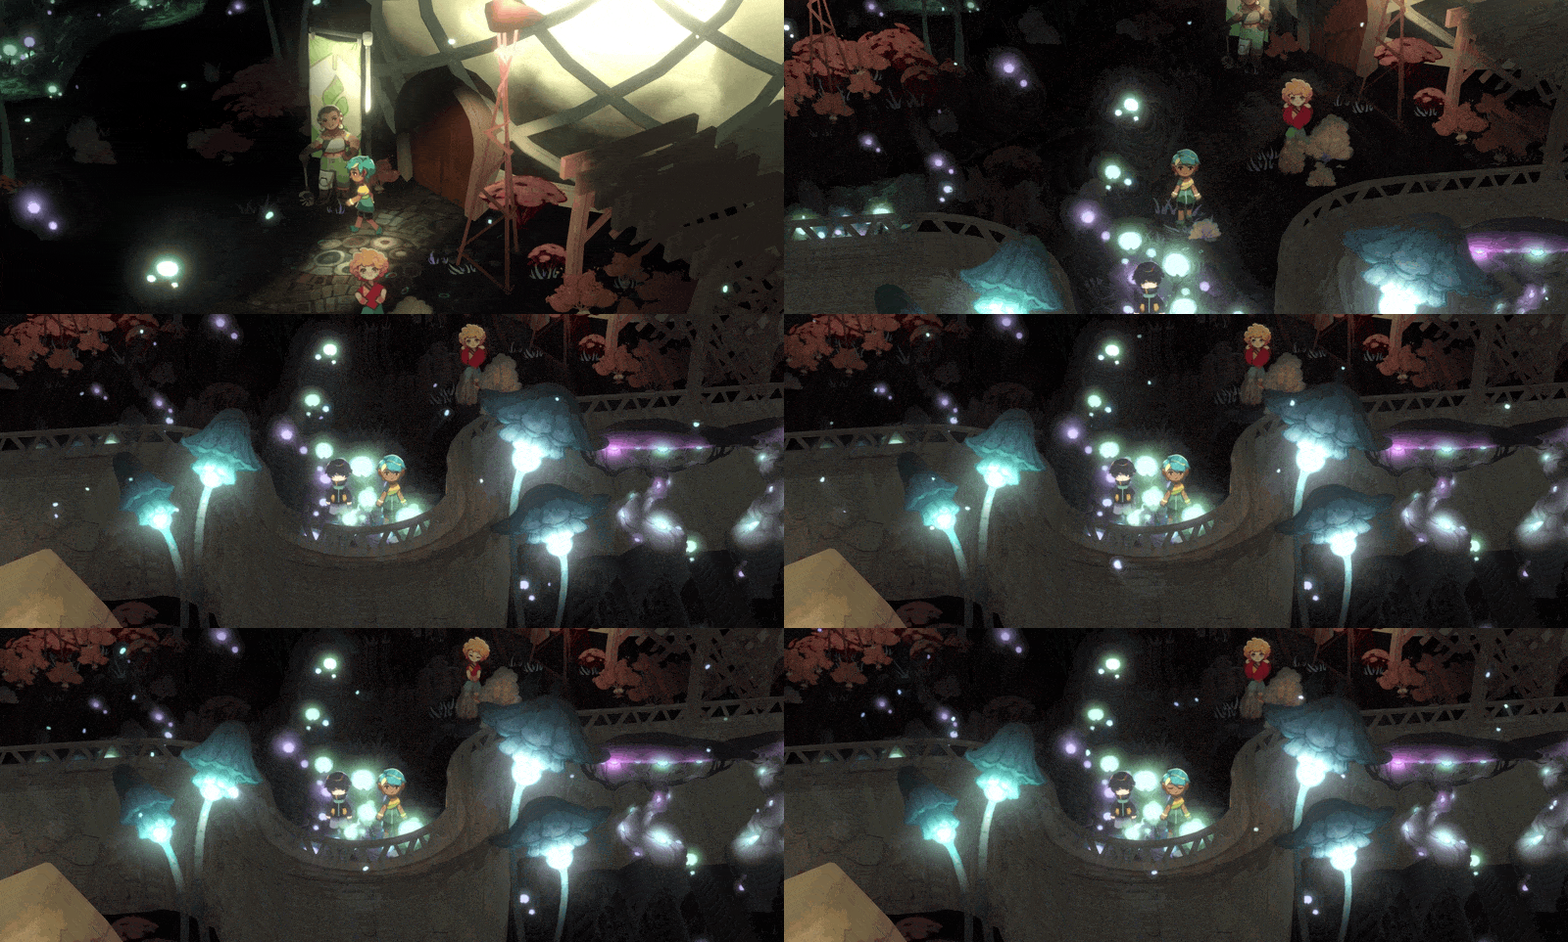
If we ever port to mobile I’m sure I’ll revisit some of these decisions and find more ways to reduce gpu cycles and lighten the load in ram. But I’m proud that Exocolonist has come so far, from “let’s throw a bunch of lights together hey that looks cool” to scenes that are attractive, consistent, stable and fast.
I Was a Teenage Exocolonist launches on Switch, PS4, PS5, and PC/Mac/Linux on August 25th.



Comments
One response to “Optimizing Glow Season in I Was a Teenage Exocolonist”
This was so fun and cool to read about! The seasons on the planet are so lovely!