• Contraption Price Drop

    Our limited-offer free bundle with the HTC Vive has ended, and they’re now bundling two new games as well as the irreplaceable Tilt Brush. This means we’re now actually selling Contraption for the first time!

    Price change to $30

    So, it was finally time to discuss the fact that at $40 usd Contraption was one of the most expensive VR games available for the Vive. I do think it’s one of the better VR titles available, but judging by our reviews $40 was more than many players are willing to pay for it. We agreed it was too high, so we’ve lowered it to $30 usd.

    The reason VR games generally cost more than traditional “flat” games is simple: right now there are way fewer VR gamers than PC gamers, which means fewer purchases, which means you need higher prices to make the same amount of money and cover your development costs. VR games will get cheaper as more people own the hardware, but this year companies are taking a risk by making games for Vive and Oculus. We want to support them.

    Up next: the Level Editor

    We’ve been showing off (and occasionally breaking) the upcoming level editor live on our Thursday afternoon Twitch stream. It’s almost another game in itself, building miniature islands in the sky and devising challenges for other players.

    We still have a few things to sort out but you can expect to see it on the experimental Steam branch soon!

  • Contraption Social Update 1.1.0

    Fantastic Contraption: The Social Update (v1.1) has been released on Steam!

    social_update_550

    We’ve always said that VR is quite the social experience, and since our launch in April we’ve been experimenting with new features that help make things easier to share with your friends.

    (Text not your thing? We have a quick video demonstration of some of the new features.)

    Twitch Chat Integration

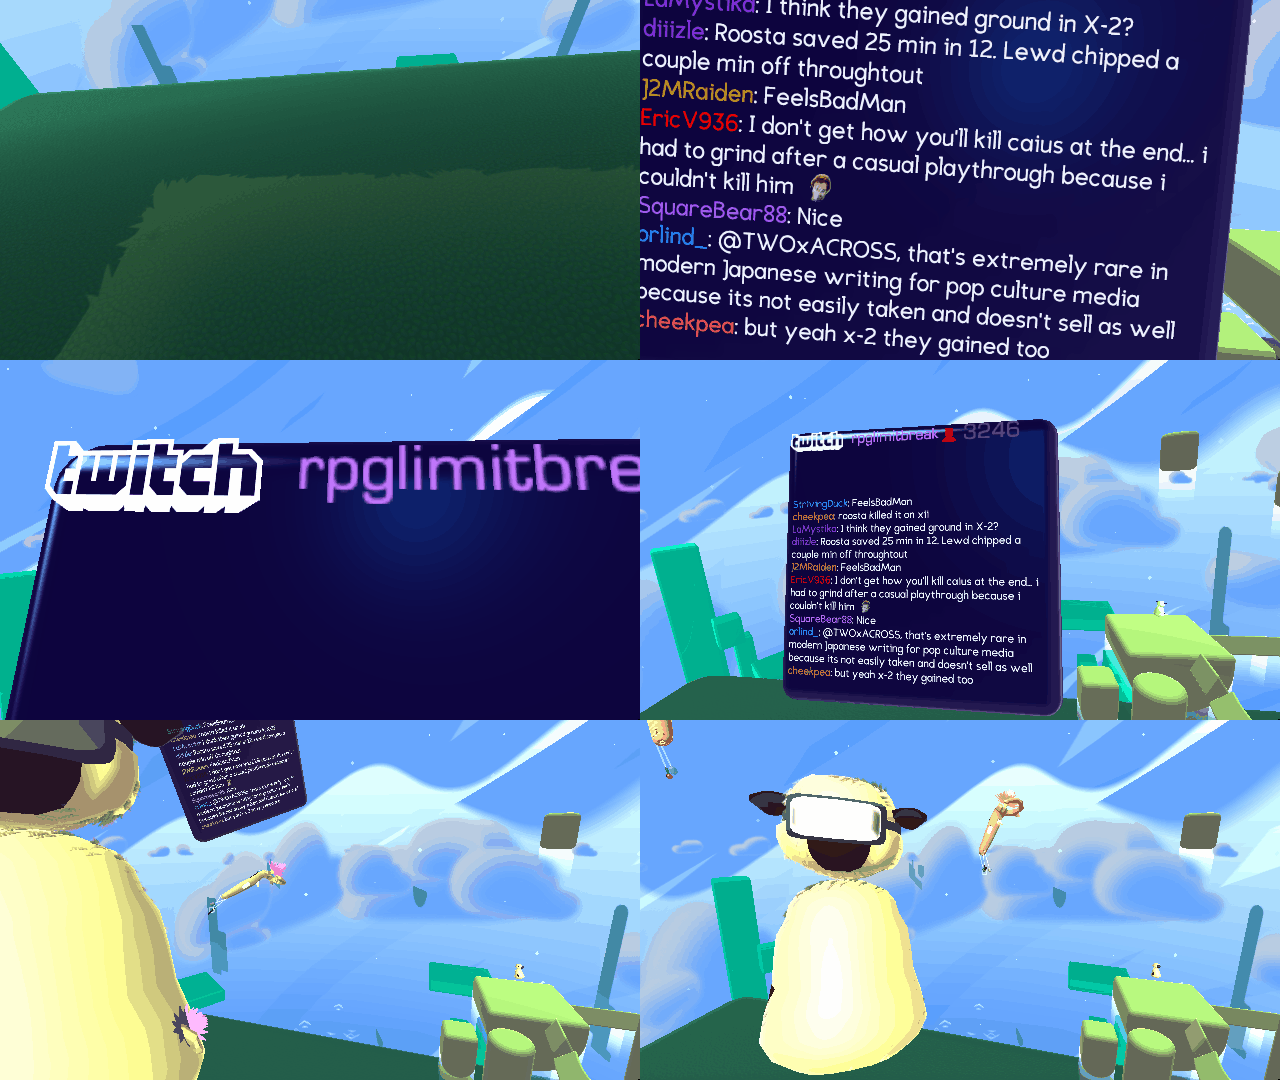
    Having to take off your VR headset to check in with your Twitch audience – or just to hang out with your friends in your favourite channel – is a hassle. Well, hassle-be-gone! You can now connect to any Twitch channel’s chat box and view it within VR! This feature (found in the new Social menu) comes complete with emoji support and a resizable VR interface that you can place anywhere in your world. We’ll even show a fancy popup if you happen to get a new subscriber or follower!

    Director Mode

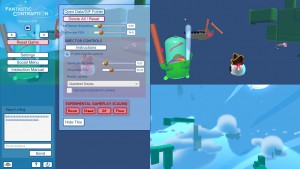
    Whether you are streaming on Twitch or just showing the game off to family at home, you often want to show the action from a different angle — without that VR sense of depth, your audience might not understand what’s going on. You can now enable Director Mode (in Settings) to unlock a bunch of cameras that you can place in your play space, or fly around with your keyboard to set up long distance shots. You can easily cycle between cameras with a set of buttons in VR and show the world just how epic things are from your point of view!

    When being viewed externally, you’ll show up as a cute animal avatar – we have a unicorn, frog, sheep, and more! Don’t forget to put on a hat!

    Mixed Reality

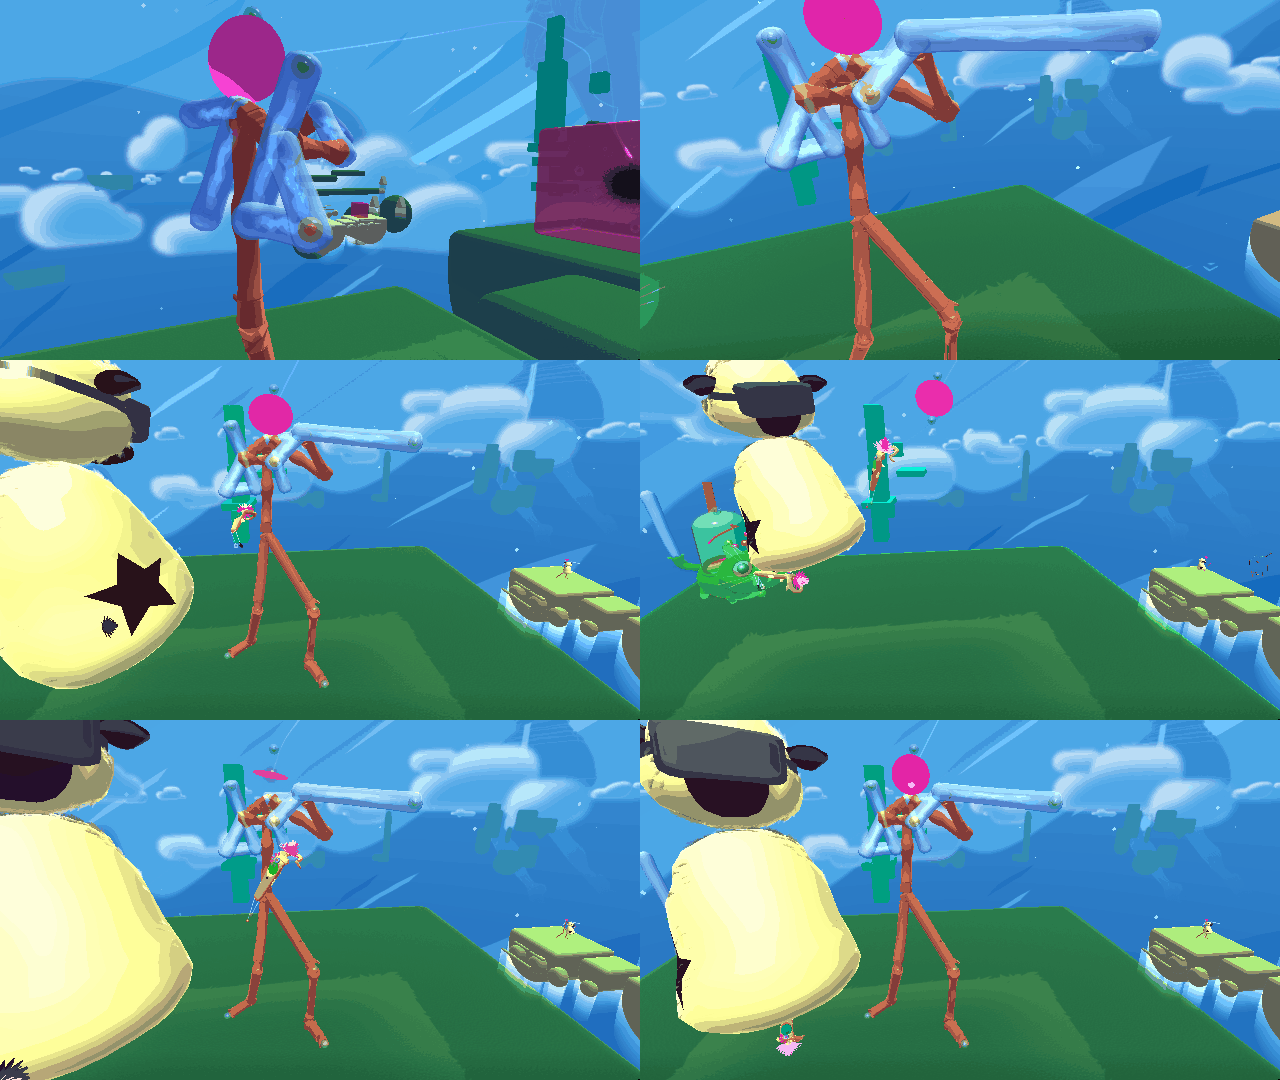
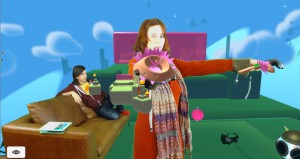
    If you’re already in Director mode, why not replace your digital avatar with a real, live human? You can capture your humanoid-emotions easily with a quick trip to a mixed-reality dropdown box in the Settings menu. We let you choose between automatically integrating a webcam into the game, or you can compose your own scene (eg, using OBS layering) if you want to integrate fancy capture cards. If you chroma-key out a green-screen you can see yourself walking around in the game world!

    We find that Mixed Reality is one of the most engaging and best ways to demonstrate the game, be it at conventions, streamed online, making trailers, or showing things off at home. To do it right you will need some equipment (green screens, a nice camera, beefier computer hardware) – but if you can pull it off it’ll look amazing.

    Tweet that GIF!

    Our old friend the eye-bug is back! Let it keep watch over you as a portable GIF capturing creature — grab onto it as it floats through your space and tap your Go button to start filming. The GIFs will save to your hard drive (in a folder easily accessible from the Settings menu).

    And if you set up your credentials in the new Social menu, posting that gif to Twitter is as easy as tapping a controller button. Share your beauties!

    Undo / Redo

    We’ve all been there – you accidentally throw your whole contraption off the edge. You have to rebuild from scratch. You’re devastated. Well, “heroes never die!”

    Those little menu buttons at the top of your Vive controllers are now Undo (left hand) and Redo (right hand). Experiment with the assurance that your mistakes are reversible!

    … And tons more!

    Though we mainly focused on the sharing features in this update, we have a whole ton of bug fixes, minor features, and [fully legal] performance enhancements in this update. Check it out!

    In our next update we’ll be focusing on some new gameplay features and other exciting things we’re still keeping secret, but if you have any desires or find any bugs, be sure to let us know in the in-game suggestion box!

    Here’s the full changelog:

    • Twitch Chat: Show emotes, number of viewers. Alert for followers and subs. Two-hands resizable. Throw to reset.
    • GIF Bug: A happy, bumbly, fly that wanders around your play-space and the level. Grab it to record 8 second gifs and, if you want, upload them to Twitter. GIFs are saved to the autosave directory, max 10 at a time named with incrementing numbers. After grabbing the bug it will stay in place. Throw it to return it to “roaming” mode.
    • Undo/Redo: Small buttons on controller now access undo/redo. Undo is batched for similar actions happening in quick succession.
    • In game camera controls: added buttons to change cameras in-game (activated when Director mode is turned on)
    • Integrated webcam mode: webcams will be recognised by the game and composited between foreground/background automatically to make mixed-reality videos simpler to make.
    • Camera Delay option for streamers in Director Controls. The Slider will delay the game rendering so you can match the delay of your camera. Greatly improves mixed-reality streaming.
    • Hand-held camera offset now settable with arrow/wasd. Also shift-arrow now “rolls”
    • All cameras are now represented by little flying bugs. Can grab them to move and rotate, will show preview of what they see until thrown.
    • Added hats to in-game avatar. ~f to toggle between hats. Also works in mixed reality.
    • Menus: Fix bug applying settings on startup. Add menus for integrated webcam settings, improve streaming menu generally. Add twitch setup to menus including a button to go to oauth key generator. Sign in to Twitter menu (for the GIF bug). Reduce arrow-key moving interfering with menu options.
    • New Sounds: New sound effects for berries, dice, twitch follows/sub, throwing rod, berry bounce, save tables
    • Music: You can now create flat notes by attaching sticky-balls to rods
    • Grab your eyes out of your head and put them on a contraption. Also eye’s rotation matches parent when moving parent object in both editing and play mode.
    • Save Tables: Faster loading from server. No longer show friends first in non-friend results. Show empty friends table if you have no friends. Improved table flipping. Small server improvements and admin tools. Minor fixes.
    • New colouring of wheels that are out of bounds
    • Warning messages now pop up on the companion window when no hands are present or twitch credentials are not set while using twitch window
    • Adjustments made to the Vive controller models.
    • Optimisation: Batching of maquette and static level geometry. Fixed some memory leaks. Skip rendering of some off-screen effects. Objects cache some internal data instead of recalculating it. Loading level is now faster and less likely to cause hitching.
    • Change some graphical settings while streaming for performance reasons
    • Fix horrible bug that makes the game unplayable if you attach a sticky ball to a glow-berry.
    • Possible fix for missing shared replays bug. Server side improvements. Add extra logging to track down missing replays bug.
    • Grab models off the dark-world maquette more easily
    • Better data sanity-checking on contraption load.
    • Reduce hitching when a replay transitions back to playing live
    • Small improvements to feedback form
    • Minor tutorial fixes
    • SteamVR Update
    • Fix for things getting stuck in the ground causing joints to disconnect
    • Fix light-world maquette interfering with dark-world save tables
    • Handle Oculus headsets better (still not officially supported yet)
    • Fix to physics glitches when pausing game with steam button
    • Better sanity checking around settings loading
    • Setting companion camera smoothing to zero will now improve performance
    • Physics stability improvements (changed wheel-on-wheel behaviours)
    • Fix for building pieces/outline not appearing properly in the Goal tutorial level
  • Mixed Reality With Quartered Screens

    There are a couple of reasons you might not want to use the in-game webcam system (which is easier to set up). For technical reasons the in-game system only supports webcams so if you are using a camera with a capture card you can’t use it. This is unfortunate because webcams look terrible when the subject is more than a meter or two away from the camera. You might also be compositing the layers together after-the-fact in which case you will need to use this method to get the foreground/background split into two.

    1. Game Setup

    Game setup is pretty easy:

    • Start the game holding shift while opening the game in steam. This will open the resolution options. Set the game to open full screen at the resolution of your  monitor.
    • Open the “Settings” menu (you might have to hit the eye button to open the left-menu if it’s closed
    • Turn on “Enable director controlls”
    • Pick “Quatered Views” in the Camera dropdown
    • Close the settings menu

    2. OBS setup

    OBS (Open Broadcasting Software) is popular streaming software and is pleasently flexible. Weirdly OBS makes it kind of hard to export settings files so I’m going to walk you through setting it up for Fantastic Contraption. It’s good to know how this works anyway so you can make any changes you might decide you want to make. First download OBS if you don’t have it already (download the Studio version). Then open OBS.

    Note that since the game is broken into four quadrants your output resolution will be half of whatever your screen resolution is. I’m going to do this totorial with a 4k monitor which will let me stream at 1080 but you don’t need a 4k screen to stream the game. Just adjust the numbers to whatever resolution your monitor runs at.

    First let’s add the game background:

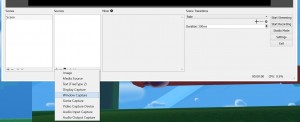
    • Hit the “+” under “Sources” and select “Window Capture”. Name the layer “Background”selectWindowCapture
    • Select “Fantastic Contraption” in the “Window” dropdown
    • Flip off “Capture Cursor”
    • Hit “ok”
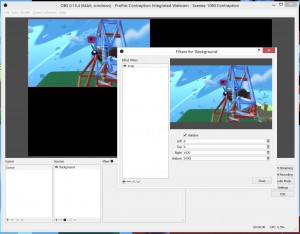
    • Right click on “Background” and select “Filters”
    • Hit the “+” on the Filters window and select “Crop”
    • Set the “Right” to “1920” (or half of whatever your monitor width is)
    • Set the “Bottom” to “1080” (or half of whatever your monitor height is)cropValues
    • Hit close
    • Grab the little red circle at the bottom right and resize the layer to fill the whole canvas area

    Now let’s add the webcam

    • Hit the little “+” under “Sources” again and select “Video Capture Device”. Name the layer “RL Camera”
    • Under “Device” select your camera
    • Hit “ok”
    • Resize the camera layer to fill the whole canvas area
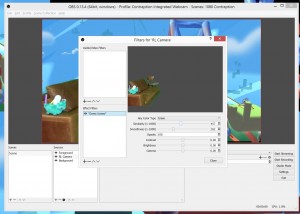
    • Right click on “RL Camera” and select “Filters”
    • Hit the “+” under “Effect Filters” and select “Color Key”. Name it “Green Screen”
    • Fiddle with “Similarity” and “Smoothness” until you get the desired effectcolourKey
    • Hit close

    Lastly, let’s add the game foreground:

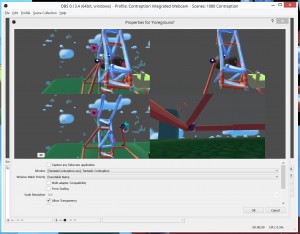
    • Hit the “+” under “Sources” and select “Game Capture” name the layer “Foreground”
    • Unslect “Capture Any Foreground Application”
    • Select “Fantastic Contraption” in the “Window” dropdown.
    • Check “Allow Transparency”
    • Flip off “Capture Cursor”foregroundOptions
    • Hit “ok”
    • Right click on “Foreground” and select “Filters”
    • Hit the “+” on the Filters window and select “Crop”
    • Set the “Left” to “1920” (or half of whatever your monitor width is)
    • Set the “Bottom” to “1080” (or half of whatever your monitor height is)
    • Hit close
    • Grab the little red circle at the bottom right and resize the layer to fill the whole canvas area

    OBS setup Done!

    3. Camera Sync

    • The last thing you have to do is sync the in-game camera with the real world camera. This means moving the in-game camera to where the real-world camera is and setting the in-game camera Field of View to match the real-world camera. This is all done very manually.
    • Make sure the game and OBS are both open and the game has the Depth Cameras turned on
    • Now open the OBS file menu and select “Always On Top”
    • Give the game focus and use the wasd keys (as well as q & e for up & down) to fly the camera around. Use the arrow keys to change the angle the camera looks.
    • This will be much easier with another person to help you. To get a rough idea of where the camera should be have the other person go into VR. They will see an insect with a big eye and wings, that’s your camera. Have them direct you, move the in-game camera to where the real-world camera is.

      Using hand controller positions to align the cameras
      Using hand controller positions to align the cameras
    • Then have them pick up the two controllers and walk to the back of the play area. Get them to hold out their arms in a T-pose and then not move. Using the arrow keys change the angle of the camera until the controllers are as close to matching the real-world controllers as possible.  Note that the FOV is still off so you won’t get a good match.
    • To match the FOV make the OBS window small enough that you can use the game’s settings menu again. Open the settings menu
    • Drag the “3rd person FOV” slider until the in-game controllers are the same distance apart as your friends (very tired) arms.
    • After setting the position and FOV set the “Camera Delay” slider. You will notice the camera lags behind the game as the player moves around. This slider will delay the game so it can match the delay of the camera. Drag this slider until the game and the player are in sync.
    • You are done setup! Because of lighthouse drift and camera jostling you will probably have to re-tune this every time you stream.


    Now go back to the previous instructions to learn the Director Controls.


  • Streaming and Recording Mixed Reality

    Welcome! We’ve spent a lot of time on the streaming tools for Fantastic Contraption. We were the first people to use these Mixed Reality techniques to show VR and we’d love for you to come join us in the game.

    maxresdefault (1)

    The instructions are broken up into three sections. Start with our first Mixed Reality Streaming How To. If you’re using a webcam then that’s all you need to know. If you’re using a fancier camera or want to do your compositing in post check out our Mixed Reality with Quartered Screens post and if you want to go full-badass and stream with a handheld camera we have Hand Held Instructions.

    Happy streaming!

  • How to Mixed Reality: Handheld

    I previously gave detailed instructions on how to stream Fantastic Contraption in mixed reality with a stationary camera.

    People are starting to pick that up and it’s very exciting! Fantastic Contraption also works with a hand held camera and in this post I’ll show you how to use it. To record hand-held video you do need a third controller though, which is going to be a big barrier for most people.

    If you have a third controller and already have the stationary camera stream set up then hand-held setup is pretty simple:

    1. get a third Vive controller (this is the hard part)
    2. duck tape that controller to your camera and plug it into the USB on your computer
    3. know where to put the camera/controller when you start hand-held mode
    4. turn on mixed reality and then hand-held mode in Fantastic Contraption
    5. align the cameras


    cam1. Get a Third Controller

    OK, yeah, this is pretty hard right now. Valve has said that they’re working on a way to get a third controller and also working on tracking devices that are designed to be added to real-world objects to make them trackable. At the moment the only way I know of to get a third controller is to borrow one from a second Vive. I have no other suggestions, sorry.

    2. Duct Tape

    The third controller tells the game where your camera is so the first thing you have to do is meld your controller to your camera. Make the coupling super solid so it doesn’t drift over time. Use duck tape, zap straps, putty, glue, whatever makes it nice and solid. Also make sure the sensors on the controller will be visible to the light houses.

    Now plug the third controller into the USB of your computer. Third controllers can not be used wirelessly like the controllers that come with the Vive. It will only be recognised if you plug it into a USB port on your computer. You’re probably going to have to buy a USB extension cable.

    cam2

    3. Why is my Hand the Camera?

    The game knows you have three controllers but it doesn’t know which one is tied to a camera. To work around this I assume that the camera controller is the one that is most “Vive East” when handheld mode is turned on. Vive East is the direction AWAY from the pink goal in-game. If you did room setup like Valve suggested then it is in the direction to the right of your monitor.

    4. Turn on Hand Held

    Go to the “Settings” menu and turn on “Handheld mode”. This will take the mixed-reality cameras and move them to where the third controller is.

    5. Align the Cameras

    You need to align the in-game and real-world cameras like in the previous guide. Use the wasdqe and arrow keys. Note that you can “roll” the camera with shift arrow.

    It’s also very important to get the camera delay correct when filming hand-held or the whole world will be swimming around.